Step-by-Step Visa Assistance for Travelers (United States)
11-Aug-2025
Applying for a visa to the United States can seem like a daunting process, but by breaking it down into manageable steps, you can navigate the system with confidence. This comprehensive guide will walk you through the entire process for a B-2 visitor visa, which is the most common visa type for tourism and medical treatment. While the core steps are universal, some details and waiting times may vary depending on the country you are applying from. Understanding each phase—from preparing your documents to attending the interview—is crucial for a successful application.
1. The Visa Type and Requirements
Before you begin the application, it’s essential to confirm that a B-2 tourist visa is the right category for your trip. This visa is intended for temporary visits for purposes such as:
Tourism, sightseeing, or visiting friends and family.
Participation in social events hosted by fraternal, social, or service organizations.
Enrollment in a short recreational course of study (not for credit toward a degree).
Participation in musical, sports, or similar events, if not being paid for participation.
Medical treatment.
It’s important to note that a B-2 visa does not permit you to work or pursue long-term studies in the United States. Your application must demonstrate that your visit is temporary and that you have strong ties to your home country that will compel you to return. These "ties" can include a job, family, property ownership, or other significant commitments.
2. Preparing Your Essential Documents
Gathering the necessary paperwork is the first major step in the visa application process. Having all of these items ready before you start your online application will save you time and prevent potential delays.
Mandatory Documents for the Interview:
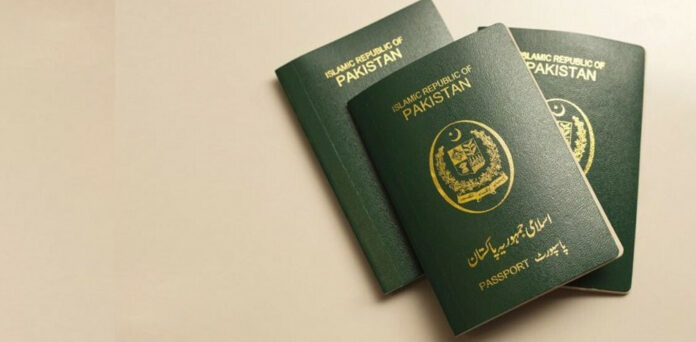
A valid passport: Your passport must be valid for at least six months beyond your intended period of stay in the United States.
The DS-160 confirmation page: This page, which you'll receive after submitting your online application, includes a barcode that is essential for your interview.
The visa interview appointment letter: A printed copy of the letter confirming your appointment date and time.
One 2x2 inch photograph: This photo must be taken within the last six months. It's recommended to have a professional take the photo to ensure it meets the specific U.S. government guidelines, especially regarding the white background and lack of eyeglasses.
Payment receipt for the visa application fee: Proof that you have paid the non-refundable Machine Readable Visa (MRV) fee.
Highly Recommended Supporting Documents (for the interview):
While not officially listed as mandatory, these documents are crucial for demonstrating your ties to your home country and your ability to finance your trip. The consular officer may or may not ask to see them, but it is better to be over-prepared.
Proof of financial stability: Recent bank statements, proof of assets, or a letter from an employer or sponsor covering the costs of your trip.
Proof of employment: A letter from your employer detailing your position, salary, and authorized vacation.
Proof of strong home country ties:
Evidence of property ownership (e.g., property deeds).
Marriage certificate or birth certificates of children.
Enrollment letters from a school or university, if you are a student.
Travel itinerary: A detailed plan of your trip, including estimated dates of arrival and departure, and places you intend to visit.
Previous passports: If you have expired passports that contain previous visas or travel history, bring them to the interview.
3. Completing the Online Nonimmigrant Visa Application (Form DS-160)
The DS-160 is the most critical part of your visa application. It's a comprehensive online form that must be completed accurately and in English.
Step-by-step Guide for the DS-160:
Start the application: Navigate to the Consular Electronic Application Center (CEAC) website and select the location where you will be applying for the visa.
Create a temporary application ID: The system will provide you with an Application ID. Write this down immediately, as it is crucial for retrieving your application if you get disconnected.
Choose a security question: Select a security question and provide an answer. This is also needed to access your saved application later.
Fill in personal details:
Provide your full name as it appears on your passport.
Enter your date and place of birth.
Include your nationality, gender, and marital status.
Enter travel information: Specify the purpose of your trip (e.g., "TEMPORARY BUSINESS PLEASURE VISITOR (B)"). If you have a specific itinerary, you can fill in the dates of arrival and departure and the U.S. address where you'll stay. If not, you can provide an estimate.
Answer questions about your background: The form will ask detailed questions about your employment history, educational background, previous travel to the U.S., family members, and security-related matters. Be honest and thorough.
Upload your digital photo: You will need to upload a digital photograph that meets the U.S. government's strict requirements. The website has a photo tool to help you ensure your photo is compliant.
Review and submit: Before submitting, carefully review every section of the form to ensure all information is accurate and consistent with your supporting documents. Once you submit, you cannot make changes.
Print the confirmation page: After successful submission, you will receive a confirmation page with a barcode. Print this page and bring it to your interview.
4. Paying the Visa Application Fee
The application fee is non-refundable and must be paid before you can schedule your interview.
Fee amount: As of the latest information, the standard fee for a B-1/B-2 nonimmigrant visa is $185 USD. This fee can change, so always check the official U.S. Department of State website for the most current amount.
Payment methods: Payment methods vary by country and may include online transfers, credit/debit card payments, or cash deposits at specific banks. The official visa scheduling website for your country will provide detailed instructions on how to pay.
Fee receipt: Once your payment is processed, you will receive a receipt. This receipt number is required to schedule your interview appointment.
5. Scheduling Your Visa Interview
Once you have completed the DS-160 and paid the fee, you can schedule your interview appointment.
Use the official system: You must use the official online appointment system for the U.S. Embassy or Consulate in your country. You will need your passport number, the DS-160 confirmation number, and the visa fee receipt number to book the appointment.
Check wait times: It is highly recommended to check the visa appointment wait times on the Department of State website before making any non-refundable travel plans. Wait times can range from a few weeks to several months, depending on the location and time of year.
Expedited appointments: In cases of genuine emergencies (e.g., a medical emergency or a funeral), you may be able to request an expedited appointment. You will need to provide documentation to support your request.
6. Attending the Visa Interview
The interview is a brief but crucial part of the process. The consular officer's goal is to determine if you meet the criteria for a visa.
Arrive on time: Arrive at the embassy or consulate 15-30 minutes before your scheduled appointment. Be prepared for security screening and note that electronic devices are usually not allowed.
Dress appropriately: While there is no formal dress code, dressing professionally shows respect for the process.
Be prepared: Bring all of your required and supporting documents, neatly organized and easily accessible.
During the interview:
Answer all questions honestly and concisely. Do not provide unnecessary information.
Be polite and confident.
The consular officer will ask about your purpose of travel, your financial situation, your ties to your home country, and your travel history.
The primary goal is to convince the officer that you have no intention of immigrating to the U.S. and that you will return to your home country after your visit.
7. After the Interview
Visa approval: If your visa is approved, the consular officer will keep your passport to affix the visa. Your passport will be returned to you via courier or a designated collection point within a few business days.
Visa denial: If your visa is denied, the officer will provide you with a written explanation of the reason. The most common reason for denial is failing to overcome the presumption of immigrant intent under Section 214(b) of the Immigration and Nationality Act. You can reapply in the future, but it's important to address the reason for the previous denial.
By following this step-by-step guide, you can successfully prepare for and navigate the U.S. visa application process. Careful planning, thorough documentation, and honest communication are your best tools for a positive outcome.
Related News
-

20-Mar-2025
Service Charges of Munazzamat for Hajj 2025
-

09-Jul-2019
Why Pakistan welcoming the tourist ?
-

09-Jan-2026
Saudi Arabia Announces Final Dates for Umrah Visa 2026
-
20-Jun-2020
Umrah Packages,Top Scams To Avoid For Pakistani Pilgrims in Pakistan
-
09-Jun-2026
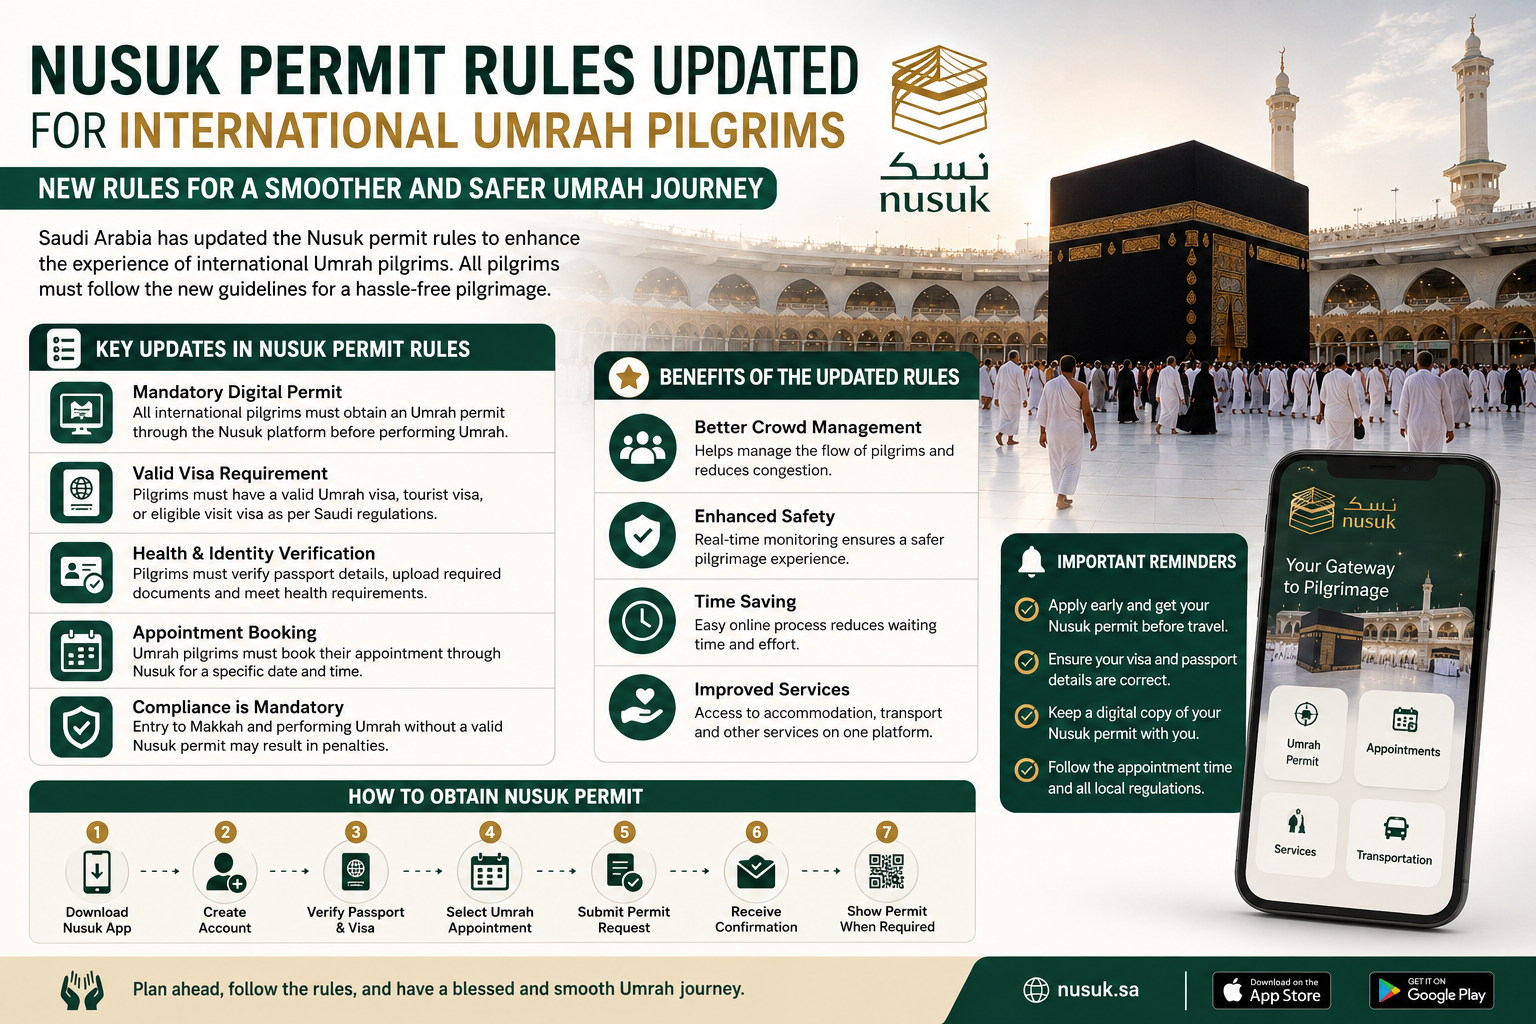
Nusuk Permit Rules Updated for International Umrah Pilgrims
-
28-Oct-2019
Umrah Dua
-
15-Jul-2024
Thailand to Offer Visa Free Entry to 93 Countries from 15 July.
-
04-Aug-2025
Top Countries Offering Easy Tourist Visas to Pakistanis in 2025
-
31-Jul-2023
Polio Card is Now Mandatory for Umrah Pilgrims
-
12-Jul-2023
Guide to Student Visa Applications: Key Details for US, UK, Canada, and Australia
-

19-Aug-2025
Saudia’s Dream Sale: Up to 50% Off Sep–Dec Flights — Big Win for Pakistan’s Umrah Travellers
-

19-Mar-2019
How to Manage your Finance while Travelling?